A Job In The Day of a Machine Service Engineer
Hello fellow service engineers, floor sanding trades people, and everyone interested in what makes a machine tick.
When I was a boy in the late 60s early 70s, the occasions arrived with great delight and expectation, when one of my parents’ modern appliances bit the dust, be it a clothes iron, record player or vacuum cleaner, and they would replace it with a new one, leaving the old one having no economic salvage value.
What did this mean for 7-yr old me? Yer, I got to take apart an electro-mechanical appliance to look inside. I would marvel at being able to see how some of its parts were designed to link together and function as a system. Of course, there would be lots I didn’t understand, not all electrical units have visibly movable components, but it would still make me wonder with intrigue as to how a few simple parts could be magically combined and packaged up and come to life in a form with which we all become so familiar from an early age.
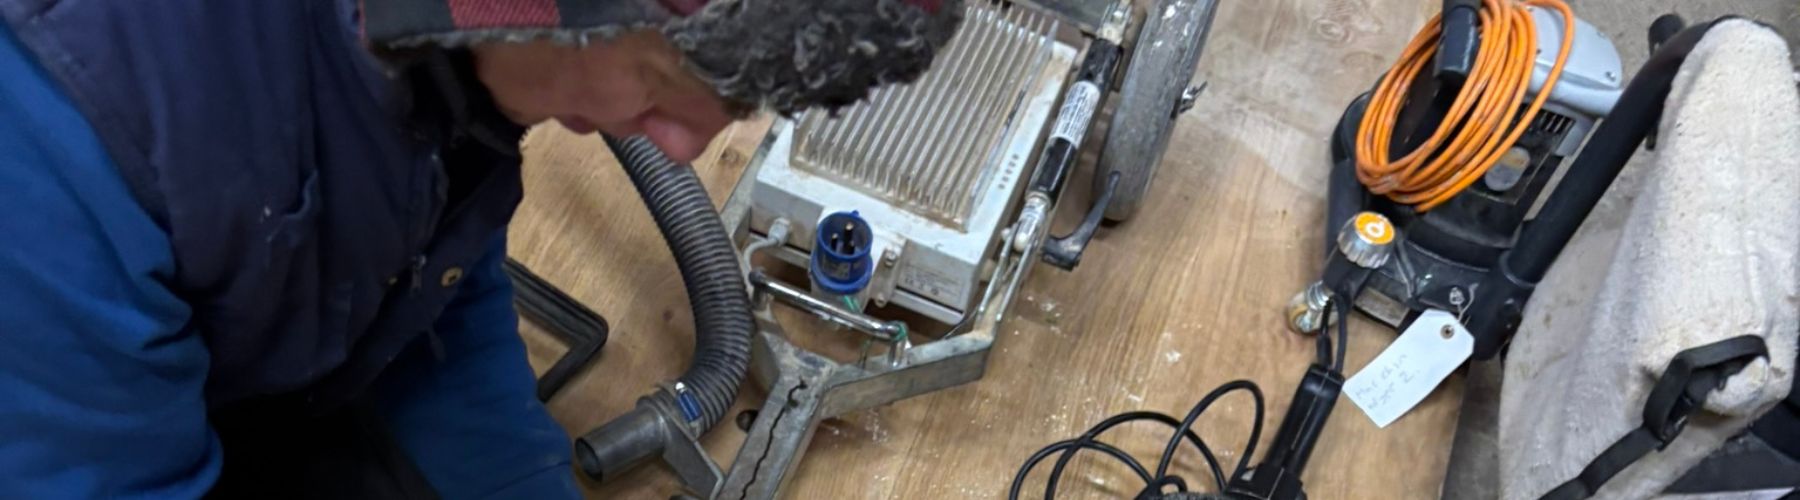
Today I’m going to take you through a ‘triage’ carried out on someone’s Pallmann Gecko Star edging sander.
There was no accompanying report as to its fault(s), so we start with a check to make sure it’s (relatively) safe enough for an experienced engineer to switch on, to see what it does, or doesn’t do. This is followed by looking in every corner, recording things of note as we peel away the onion-like layers of a machine’s sub-assemblies. So let’s dive in.
First off, I’m looking at the state of the plug and flex. These are the two most vulnerable to damage and potential safety risks.
See my blog on this here. https://ultimatefloorcare.co.uk/blogs/news/a-blog-about-those-pesky-plugs-flexes-and-extension-leads
Stage 1


Ok, so these two cuts are definitely PAT test failures, and no conscientious technician would send this back to a consumer, but, mindful of them, and that the plug looked fine, I can switch on.
Stage 2 Watch these videos
Well switching it on didn’t do anything. I wonder why? Oh look, someone’s taken out the fuse. That’ll do it
!
Ok, so it may not be possible to tell from the sound track on the first video, that the machine sounds and feels hellishly rough. What could cause this? Well things like this rotate at 3800 revs per minute. That means if the weight of a spinning part is ‘off centre’ and therefore out of balance, the motor is trying to throw it’s off-centred weight backwards and forwards, changing direction at the rate of 126 times a second. It takes a phenomenal amount of force to make even a light-weight thing do that. Remember they say a baby’s head hits the windscreen of a car during a crash stop with the force of ¼ tonne? It’s the same principle.
If you rested a hammer on the head of a nail hoping its weight will push the nail in, you’d get laughed at. But when the nail is asked to stop a falling hammer dead, within 1/126th of a second, it’s impossible and most of the hammer’s (substantial) inertial energy is transferred to the nail, which then can’t resist being driven into the coffin.
So from the second video we can see that something about the motor is bent, which is causing this high-speed rough vibration, and the third video shows us that the abrasive pulley assembly is also bent, and adding to the vibration, and that bearing does sound dry and rumbly doesn’t it? I think we’ll change that.
Finally, watching the forth video shows us that taking off the pulley and fan leaves a perfectly straight and smooth running motor shaft, not to mention quieter. This is good because the pulley/fan is a lot cheaper and quicker to change than the motor armature.
So, what else did we find with this Gecko Star?
Stage 3 Missing parts

Neither of the LEDs work. While it could be two blown LEDs, it’s more likely that the PSU is blown, which would automatically affect both. And while we’ve got the chassis apart, I access its output wires to check the voltage on the meter. No volts – means it needs replacing.

The nose piece is missing. This doesn’t just act as a protective buffer, it forms part of the dust extraction chamber.

The lock pin that hold the dust tube in place is missing

One of the two nose plate screws is missing, and so is the middle nose screw. It’s always the middle one, because the other two are held in place under the chassis.
 The knurled nut and eye bolt screw are missing. These are a really good feature of the Gecko Star for adjusting the belt tension, and worth having.
Stage 4 Worn or broken parts

The belt cover plate should have screw holes at the corners, but something has worn off the two nearest the abrasive pad.

There should be a thumb turn lock screw for the height adjustment of this wheel. It’s not critical, but I have them in stock so I’ll ‘treat’ it to a new one.

Indeed, the whole screw hole casting is broken off where the belt cover plate goes. I can’t repair this without TIG welding, which I haven’t got, or an expensive new chassis casting, so I discuss the client’s options with them.

It was practical to address the vast majority of these faults within the client’s budget, and restore
full functionality for a little under half the price of a new machine, and despite the numerous items of wear and some damage, this need not curtail its future life if looked after.
If there’s one thing that can often write off a small machine like this, it will be damage to the commutator (copper contact ring where the carbon brushes are).
The wear on these is greatly accelerated when dust gets between the carbon brushes and the commutator they make contact with as the thing rotates. It’s the second most expensive part of most small machines, and little can be done to restore this part once damaged.
The biggest cause of dust getting to this area of the motor is a slack fitting where the dust tube fits into the chassis.
My advice is, never move or remove the dust tube from the machine. It’s the friction that causes the wear and sloppy fit. If it’s never disturbed, there’s never any friction. No friction, no wear. No wear, no dust escape. Simples, innit?